
How to Choose an Outdoor Tent for Elegant Backyard Events
- Jul 25
- 4 min read
Memorable backyard gatherings should not feel as if they happened under a rental. The best tents read as an extension of the house: a designed outdoor room that borrows the home's palette, clean lines, and ease. Getting there depends on deliberate choices around surface, size, comfort, and light.
This guide walks through those choices, from mapping your site to sourcing the right structure, so the result feels intentional rather than temporary.
Start With the Feeling You Want
Before measuring, decide how the space should feel. A tent that complements your home's architecture, from stone terraces to painted trim, tends to disappear into the setting instead of competing with it. Consider the guest journey: where people arrive, what they see first, and which view or decor moment you want to frame.
Step 1: Map Your Site Elegantly
Walk the yard, note the flat usable area, and measure it. Mark trees, pool edges, patios, grade changes, irrigation lines, and the route installers can use to access the space with equipment.
Plan generous circulation. Federal accessibility guidance suggests an accessible route should keep a continuous clear width of at least 36 inches, a useful benchmark for comfortable pathways. Where a small grade change leads into the tent, a ramp with a running slope no steeper than 1:12 keeps the transition gentle. These are planning anchors, not a substitute for local requirements.
Step 2: Match the Tent Style to Surface and Season
Style choices are also engineering choices. A few common types:
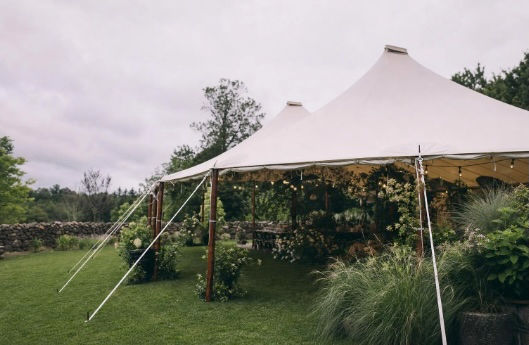
Pole and sailcloth tents create romantic, sweeping peaks. They rely on staking, so they work best on grass or other stake-friendly surfaces.
Frame tents have no center poles and create open, unobstructed interiors. Because they can be anchored with ballast, they can sit on concrete or a patio where staking is not possible.
Clear-top tents emphasize natural light for a bright, scenic interior, an aesthetic often chosen for elegant backyard settings. The tradeoff matters: clear tops do not block sunlight and can trap heat, so they suit spring, fall, and evening use unless you add shading or cooling.
Step 3: Size Precisely, and Beautifully
Sizing is where comfort is won or lost. Common planning heuristics allow roughly 15 to 17 square feet per guest for a seated dinner, and about 20 square feet per guest once you add a dance floor. Theater-style seating is often planned around 6 square feet per person.
For dancing, a frequently cited example puts 100 guests near a 200 to 225 square foot floor, about 15 by 15 feet. Leave room for a catering pass, bar, lounge grouping, and clear sight lines.
Step 4: Flooring, Staking, and Anchoring
Flooring transforms a tent from a covering into a room. Interlocking event flooring can sit over grass, asphalt, or a road base to create a stable, heel-friendly surface while helping protect turf and level uneven ground.
Anchoring deserves professional attention. Pole tents are staked; frame tents can be ballasted where staking is impossible. Industry ballasting tools help installers anchor tents safely, one reason anchoring is not a DIY task for a refined event. If a tent will sit over stone, a deck, or a pool, raise it early with your installer, and rely on proper professional pool covers rather than improvising.
Step 5: Plan for Comfort
Climate planning should weigh tent type and color alongside guest count and activities. Clear-top tents heat up quickly in direct sun, so vendors commonly advise thoughtful timing and shading. That makes them a natural fit for shoulder seasons or nighttime events, when the canopy becomes a starry ceiling instead of a greenhouse. Comfort is also what makes outdoor entertaining spaces feel gracious across seasons.
For warm weather, consider ventilation, fans, and cooling appropriate to the tent. For cooler evenings, use rated outdoor heaters and follow clearance and fuel-handling rules, keeping cylinders and combustibles well away from the tent. Local fire guidance should be your final word.
Step 6: Light It Like a Room
Layered lighting carries the interior feeling outdoors. Combine ambient light from dimmed bistro strings, accent light such as uplights on trees or architecture, and a focal moment like chandeliers. A translucent sailcloth top glows softly from within, while a clear top can showcase the night sky. Tying finishes and color back to your interiors creates a seamless through-line from house to tent.
Step 7: Permits, Flame Certificates, and Sound
Rules vary widely by jurisdiction, so confirm locally. In Seattle, tents over 400 square feet generally require a fire permit plus flame-resistance documentation such as an NFPA 701 certificate. Fairfax County, Virginia exempts some smaller tents, roughly 900 square feet or less with fewer than 50 occupants, from permits. Thresholds differ, so verify with your local fire marshal.
Ask your rental provider for the tent's flame-resistance certificate. If you plan amplified music, check local sound rules; many cities regulate outdoor amplified sound and offer a variance process for off-hours events, which helps keep a party on good terms with neighbors.
Where to Browse and Compare Tent Types
Before calling local rental pros, it can help to browse examples of an outdoor tent and compare how common styles are organized by use, surface, and footprint. Treat that research as a way to build vocabulary and narrow preferences, not as a replacement for a site visit or local guidance.
Step 8: Power and Safety Details
Refined does not mean fragile. Specify outdoor-rated cords, GFCI protection, tidy cable runs, and weather-rated fixtures. Position catering equipment, heaters, and any generators according to local fire rules and well clear of exits, so the safety layer stays invisible to guests.
Step 9: Source Smartly
Talk to local rental professionals early, especially for peak months when popular inventory books quickly. Ask for scaled drawings so you can see how the tent, dance floor, and lounge areas relate before anything is delivered.


